Shop Improvements!

The last few months we’ve seen a lot of physical changes around the shop. Earlier this year we converted some of the low utilization areas into studio spaces. That’s fully realized and now provides dedicated space to a few of the growing businesses like Gail of GW Stitchin Depot that are here every day.

A few weeks ago we had a massive clean-up of the front common room , conference room, and woodshop areas. Spring cleaning! Not exciting, but much needed (and still ongoing).

Last week Lindsay, Eric, and Hunter started to clear out, clean up, and put on a fresh coat of paint in our ‘conference room’ (We need a new name). As <fingers crossed> COVID continues to evolve into less and less of an issue, we plan on inviting more groups to run more workshops, demos, and talks. If you have a need for a space to do something that’s associated with making, let us know!

What we’re really excited about with this space is our upcoming Make & Takes. These are providing some great opportunities to dip your fingers into what happens here every day, with no tool experience required. Last weekend we introduced our Kumiko Panel workshop, we had a blast!

Next month we’re offering our new Bird House Make & Take, a second run of our Kumiko Make & Take, and we’ll be introducing a Most-Excellent-And-Up-Until-Now-Secret CNC Make & Take : )!

Makers in the Shop!

Last month Fusion of Iron and Earth put together a giant new piece! This is Kelly O’Neill, who designs, fabricates, and sells wonderful sculptural work primarily made from found / scrap metal. You’ll often catch her in the metal shop operating the CNC Plasma Cutter or chopping up giant sections of steel on the Horizontal Bandsaw. Kelly has a significant shop of her own, watch the video to catch a little of both worlds!

Einor built some beautiful wood enclosures for his motion sensor project. This involved a nice pairing of the laser cutter to engrave one part, and the ShopBot CNC router to route out the pocket for the electronics. Note the tiny lip on the middle image, precisely routed to allow the laser cut portion to snap right in.

Motor City Comic Con, Art Birmingham, and Ann Arbor Summer Fest are all coming up! You’ll find a number of our members gearing up as exhibitors for these events. Lana (pictured) runs Saving Throw Pillows, prepping our ShopBot for another run of her dice boxes. She can also be found operating the Roland Vinyl Cutter or Epilog Helix Laser Engraver to further customize her products.

Upgrade for the PCB Engraver!

For members into electronics, being able to fabricate a printed circuit board (PCB) can be very handy. We’ve had the enormous 22” x 22” PCB engraver since we opened; it lives in the plywood enclosure in the Electronics area.

Our IBC 2222 PCB Engraver used a simple method for lowering engraving bits and drill bits into the PCB material. A strong solenoid dramatically “slammed” the bits down. It did work, but it seemed quite brutish, especially with small drill bits that easily break.


We’ve finally taken the plunge and designed a new Z-axis. A small stepper motor now precisely lowers the bits, while a strong spring allows the depth-setting foot to accurately set the engraving depth as before.


Other improvements: The z-axis can be controlled via the gamepad remote. Click on a single icon to convert KiCad PCB files to G-code. There’s a new procedure for fine-tuning the engraving depth. There’s now an SOP for generating PCB files in KiCad. New buttons in the controller drill alignment holes, raise the Z-axis for tool changes, and save/restore the origin. The PCB computer is now on the network and can access the shared temporary storage. A better (wider) alignment plate is installed. Not visible, but we re-wired the insides almost completely.


We’re pleased with the improvements to this tool!


We offer the PCB Engraver checkout class as well as a KiCad schematic capture and PCB layout class.

A shot of the PCB Engraver with the upgraded Z Axis control

Here’s a closeup from a circuit we just engraved


11 Years of Service - Now We Need Your Help

Maker Works opened in 2011, and for about ten years was privately subsidized by just a few people. In 2020 the decision was made to start transitioning to a Non Profit, and in June of 2021 Maker Works Community Workshops received its 501(c)(3) designation.

Over the past 11 years we’ve supported numerous FIRST Robotics Teams, hundreds of businesses, and thousands of people with shared access to tools, training, and space. We’ve also met some wonderful people supporting activities like Fix-It-Friday, Tool Maintenance, Great Maker Race and many community projects.

While we have no debt, in 2021 we lost an average of $12,000 a month. There’s enough cash flow to keep things going for the time being, but we need to change that trajectory. Click here for financial details, join a virtual meeting this Monday, 3/14 at 7pm, and continue below to find a few reasons why you might want to help (and how), thank you!


We need help introducing the shop to more people! Do you know someone that should know about us? Interested in helping share what we do? Or, are you a professional marketer? Click the button, let us know!

Take a Class!

Wood, Metal, Jewelry, Electronics, Textiles, and Software classes provide low cost opportunities to introduce people to relevant skills, build things they need, and launch or grow small businesses. Sign up for a class today! Pictured is Dulce teaching a young woman the tools and knowledge to build and mount a Coat Rack for their home.

Become a Member!

Ewunet - Amazing Woodworker!

Membership provides access to a shop full of tools, space, and community. We've had over 1,500 people start a membership, some individuals like Ewunet (pictured) come in to expand their craft. Others come in brand new to the world of making. During any given month we have around 130 active members, and we have capacity to support many more! Whether you have decades of experience with tools or none, we provide a welcoming community for all.

Make a Donation

We try to keep membership and class costs low because we want our shop to be accessible, but we can’t do it on our own. Your donation helps provide groups like FIRST High School Robotics Teams a home to work. It helps young social entrepreneurs like JustIzzy's to grow, supports our Maker in Residence Program, and countless member led activities that support organizations like May We Help, Our House, and Tinkered Toy Box. Please, make a donation today!

Memberships for Universities, Schools, and Corporations

Are you looking to increase capability for your organization, extend your student’s options, or offer a truly unique staff enrichment program? We can custom tailor to your needs, just ask!

Corporate Sponsorship

Are you involved in an organization that wants to to be a visible steward of the making community? We've never offered this before, and we can hardly wait to find out who will be the first to join us!

Dedicated Studio Space

We have over a dozen small businesses with dedicated space in our shop. Companies like GW Stitchin Depot (pictured) got started by taking a class and using our tools. In a year their business has grown to a point where they’ve purchased their own laser and now have studio space within our shop. Our community of makers is constantly supporting and growing small businesses. If you need space, let us know!


Are you familiar with the work we do, and know of specific grants or funds that can help? We'd love to hear about them!

Share This Page

Seriously! Whether it’s with your friend who might be interested in the shop, your boss who you think might be interested in sponsoring, your business partner that needs to build that prototype, or an artist who needs access to a large CNC Router.

Let them know : ) Not a day goes by that we don’t hear “You’ve been here for how long?”

Thanks for listening. Please let us know if we’ve missed something!

Jewelry Resources at Your Local Makerspace

Makerspaces are popping up all over (see partial list of Michigan makerspaces below), and offer members access to tools, space, instruction, and a community of fellow members with amazing skills and creativity. Even if your local makerspace does not have a jewelry studio, drop by and check it out. You may find resources there to take your jewelry to new places. Most makerspaces will offer basic safety and operation classes for all their tools. Here are a few ideas for how you can use your local makerspace in support of your jewelry:

Epilog laser cutter &amp; engraver

Epilog laser cutter & engraver

Laser cutter. Almost every makerspace has a laser cutter/engraver. Most are in the range of 20-100 watts (ours is 50W), and are great for cutting and engraving organic material like plastics, wood, paper, and fabric. They are usually far too weak to cut or even mark metal, but there are coatings that you can apply to metal and then the laser will mark. Anodized aluminum will turn white and produces very high resolution and high contrast images. Engrave card stock or acrylic (both one-time use) to produce patterns for the rolling mill. Create models in acrylic for sandcasting. Remove resist from metal for etching. Create jigs from wood or plastic.

Laser cut acrylic for hydraulic forming

Laser cut acrylic for hydraulic forming

Laser engraved pattern for rolling mill

Laser engraved pattern for rolling mill


Form 2 SLA 3D printers

Form 2 SLA 3D printers

3D printer: Even the smallest of makerspaces will often have at least one 3D printer. (Your local library may have a makerspace with a 3D printer.) There are several types of 3D printers—we often say a “fused filament” printer is a computerized hot-glue gun for plastic, while “SLA” printers use a light-senstive “goo” that a laser selectively hardens. I’ve had nice success using both fused filament (with “PLA” plastic) and SLA (using a “castable” resin) to create models that burn away for lost-wax investment casting. SLA can give outstanding results without a lot of fuss, while fused filament may require more work to get nice smooth surfaces. You can also 3D print models to use for creating silicone molds for wax-injecting or, with high temperature silicone, molds for directly casting pewter.

Pewter investment casting of 3D printed object

Pewter investment casting of 3D printed object


Emco CNC milling machine

Emco CNC milling machine

CNC milling machine: These can range in size from desktop to the size of an SUV, and are computer-driven tools that can machine away materials ranging from styrofoam to hard steel. “Machinable wax” is a great material to use for jewelry models, but you can directly machine many types of metal easily, and on a small scale. Most CNC milling machines can easily handle tiny cutters well under 1.5mm (1/16”), and v-shaped cutters can add nice detailing. The downside to these computer-driven machines is that they do require learning software to create the model (though you can use 3D scanners to scan a real object, as long as it is big enough). “V-carving” on a CNC milling machine can create engraving with more flexibility than traditional pantograph engraving machines.

Wax model machined on a CNC mill, sitting on the anvil it is a copy of.

Wax model machined on a CNC mill, sitting on the anvil it is a copy of.


Grizzly Media Blaster

Grizzly Media Blaster

Media blaster: Often using a hard abrasive, media blasting can use anything from baking soda (about finger-nail hardness) to silicon carbide (one step below diamond). Depending on the media used, you can strip off coatings, produce bead blasted or matte finishes, and, with the use of stencils or masking, etch patterns.

Powder coating: A plastic-like powder is electrostatically deposited on a metal object, then baked for 10-20 minutes at 400 degrees or so, producing a robust coating. The range of colors, textures, and effects available is impressive. Combine with the laser engraver for different effects—engrave after powder coating to reveal the metal underneath, or use the laser to selectively bond the powder, then blow off the rest before baking for selective coating.

Metal shop tools: The typical makerspace metal shop has tools for welding, grinding, sanding, sawing, shearing, bending, drilling, and so on. In some cases the scale will be off for jewelry, but in other cases the tools will have a precision that applies nicely. For example, a corner notcher for sheet metal will, if in good shape, make precision 90-degree cuts in any sheet metal, including thin jewelry metals. A finger brake can produce repeatable, accurate bends. A vertical bandsaw can be handy for cutting thick sprues that would take a long time using a fine-toothed jeweler’s saw. Some makerspaces may have a water jet, capable of cutting extremely hard materials often with great precision.

Hydraulic press: Aside from cost, the hydraulic press in the jewelry studio used for different types of forming is identical in function to the press in the metal shop. A fast way of creating hydraulic die forms is to laser cut them from acrylic. There’s a machine shop with welding and fabricating tools to make rings and other accessories as you need them.

And don’t overlook the woodshop and other areas at a makerspace. You can make your own display racks, signs, and work benches, for example. Keep your eyes open for the wood scraps—some exotic wood is extraordinarily beautiful even at a jewelry scale. The electronics area will often have stereo microscopes, precision soldering irons, and precision engravers for creating circuit boards—but that can be used for engraving sheet metal. One of the most useful aspects of a makerspace is the cross-fertilization that happens between the different areas.

Each makerspace will have its own feel, set of tools, policies, and community. Most will operate on a membership basis, which means your access to tools is independent of being in a class. Many spaces offer extended hours (even 24-hour access). Pick a makerspace that makes you happy, that you look forward to going to. Most are very happy to give you a tour and explain how they operate.


Some stand-alone Michigan makerspaces:
Ann Arbor: AHA/All Hands Active, Maker Works
Canton/Westland: The Work Shop (The Tool Shop)
Detroit: OmniCorp Detroit
Ferndale: i3 Detroit
Flint: Factory Two
Grand Haven: Studio JSD (jewelry focus)
Grand Rapids: Treetops Collective
Jackson: Jackson Makerspace
Kalamazoo: KZoo Makers
Lansing: Lansing Makers Network

Check with your college, university, or local library—they may have a makerspace or are planning one.

Pewter investment casting of 3D-printed object

Pewter investment casting of 3D-printed object

Maker Works Community Workshops Announcement

MWCWLogoColor with white background.png

Maker Works is pleased to announce the next phase of our makerspace—a transition to a nonprofit!

You may or may not know that Maker Works has until now been a for-profit with three bottom lines:  people, planet, and profit.  We have done great work on the people and planet bottom lines, and firmly believe the Ann Arbor area is better for having this makerspace.  But we have not had great success with the profit bottom line, and that's pretty important for sustainability.

As a nonprofit, however, there may be additional opportunities for relationships with schools and state and local agencies that have not been available as a for-profit.  Also, nonprofits are eligible to receive grants and donations. 

Over the past many months, we've been working with a local foundation that is interested in funding the formation of a new nonprofit to acquire and operate Maker Works.  We're happy that the agreement is now in place, and a new nonprofit, Maker Works Community Workshops, will be completely taking over all Maker Works operations as of January 1, 2021.

What does this mean for our members?  The space will operate just the same as always.  Same staff, same vision, same basic mission—which is:

The mission of Maker Works is, through its educational programs, to expand the knowledge and develop skills of adults and students in our community in a variety of fabrication technologies outside of, but sometimes augmenting, the formal educational system; to encourage the establishment and growth of small businesses in our community, especially small businesses led by minorities or people with low income, through access to high capital equipment and technical instruction; and to promote the creation and sustainability of makerspaces in other communities through the sharing of best practices.

Day to day, January 1, 2021 is going to look very much the same as December 31, 2020 (except for the whole being closed on New Year's Day thing).  Memberships will be honored in full and carry over, the same carefully-curated selections of pop will be in the fridge, Daisy Jane will continue to oversee the common room, and at most we're hoping you'll just have to sign a new member agreement.  (And we're really sorry about that—we know we just had everyone sign a new one after the pandemic began.)

Just to be clear, while Maker Works Community Workshops is a Michigan nonprofit corporation, it does not yet have its 501(c)(3) exemption, though it's in process.  Once the organization receives the exemption, likely at least 3-6 months down the road, it can receive tax-exempt donations.  Also note that membership and other charges will not be tax exempt—only contributions in excess of the fair value received in exchange will be deductible.

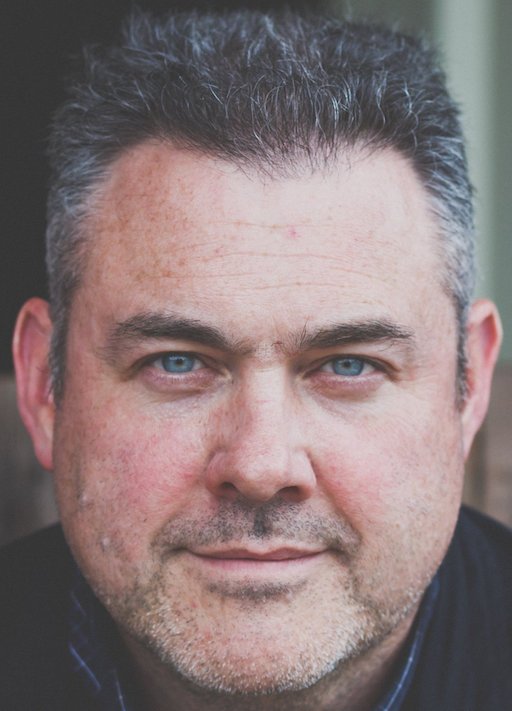
We are delighted that Josh Williams has agreed to be the new executive director of Maker Works Community Workshops.  His expanded duties will include overseeing day to day operations, managing staff, and reporting to the board of directors.  Josh has been on staff since June 2014, and is, as you all know, enthusiastic and helpful.  His dial goes all the way to 11.

The current, amazing staff will remain:  Al McWaters, Dulce Morales, Eric Rudolph, Irene Wei, Je'Tone Alexander, Kirstin Hensley, Pamela Cohen, and Timothy Huang.  They make Maker Works work, day in and day out, and are very appreciated.

We'll now have a board of directors to provide long-term strategy and to support the executive director and staff in meeting our mission.  The new volunteer board of directors includes:

Katie Frank.jpg

Katie Frank

Managing Partner of ZingTrain, trainer and presenter on topics including Customer Service, Servant Leadership and Performance Management.  Former Zingerman's Bakehouse manager.  More about Katie at https://www.zingtrain.com/trainer/katie-frank/


Shawn Marie Pelak.jpg

Shawn Marie Pelak

Community Member.  Previously Program Manager of the National Poverty Center at the University of Michigan Ford School of Public Policy, where her responsibilities included grant writing, budgetary oversight, and project management.


Tom Root

Co-Founder of Maker Works and long time Zingerman’s Community of Businesses Managing Partner. Lover of Lean Manufacturing and perpetual parallel entrepreneur.


And Tom and Dale, who you already know!


Tom and Dale are very thankful for your membership at Maker Works.  It's been over 10 years since we started this venture and we have had the pleasure of meeting some of the nicest and most skilled people around--often in the same people.  We hope to see Maker Works continue to offer a great combination of tools, space, instruction, and community, for many years to come.

Questions?  Email us at membership@maker-works.com or call us at 734-222-4911.

Face Shield Production at Maker Works

Almost from the start of the COVID-19 pandemic here in Michigan, staff and members were thinking about how to use their making skills to help hospitals and other health care providers meet the need, especially around personal protective equipment like masks and face shields.

The Ann Arbor Sewing Center and others in the community jumped in to fabric face mask production, and many thousands were produced (and are still being produced, now that everyone is being asked to wear them). And early on, people were 3D printing a succession of designs for face shields. But Maker Works only had two fused-filament printers, and our two resin printers are much slower (though very high resolution), and it takes 30 minutes on up to print even the most optimized design. We wanted to produce a higher volume, since it seemed like there was great need locally and regionally. Irene agreed to lead the charge.

Looking at the design for the popular 3D face shield holder from Prusa and others, it looked like two curved flat bands.

Example of 3D Printed Headband

Example of 3D Printed Headband

Stagehands have a saying—Never lift what you can drag, never drag what you can roll, never roll what you can leave.  

When looking at a plastic object, we might offer—Don't machine what you can 3D print, don't 3D print what you can cast, don't cast what you can injection mold, don't injection mold what you can laser cut from flat, and don't laser cut what you can punch. (All these suppose you have the volumes, time, and capital to invest in the various technologies.) In this case, the two bands suggest the possibility that we could create a similar face shield holder much faster by making two flat bands and bonding them together. Tabs can be used to secure the face shield and also as a connection point for the rubber band at the rear, so the stock can be flat.

We initially laser cut two strips from 1/16th inch ABS plastic sheet (we had some in the shop from some vacuum forming) and bonded them with acetone, but the bands did not bend uniformly due to the cut outs for the tabs. ABS happens to relax at just over 200°F, so we made stainless steel forms in a C shape, clipped bands to them, and boiled them in water for 2 minutes. The bands then assumed the correct shape.  It did seem strange to have a boiling pot of water as part of our production line, though. Marty has since provided a mascot, Louie the Lobster, for this part of the process.

Bonding with acetone took a while per joint and we had trouble with some joints even with clamping (probably due to the raised edge the laser can leave). It's also messy and there are fumes. Bob Gifford, Automotive Sales Manager of Branson Ultrasonics in Sterling Heights, MI, very kindly tested, set up, and loaned us an ultrasonic welder for bonding the two straps together, a huge improvement in time and robustness. (It is one of the more fun jobs on the line.)

For some weeks, we expected to run out of the clear plastic for the shields themselves at any moment, but Operation Face Shield, MW members, U of M, and others always came up with material that we could machine on the ShopBot or cut on the laser. More recently, Mike Wright of Flint's makerspace Factory Two arranged a group purchase of some PET film they found in Chicago, and a local company Sensitile generously has been cutting shields out of this material for us. We also received generous donations of ABS plastic and clear plastic from the U of M Hospital, and support from EMU's Engage. AHA! (All Hands Active) makerspace helped laser cut a lot of shields for us and MS2 (Midwestern Software Solutions) provided thousands of rubber bands.

(As an alternative to laser cutting, we did get some steel rule die cutting blades, but have not experimented with them. Hopefully we won't have a need associated with PPE to revisit that.)

A later improvement was the addition of a visor element that almost entirely covers the space between the shield and the user's forehead, which was a concern for some users.  This required a third laser-cut piece and heat bending the two tabs.

For some weeks then, our production was:

  • laser cutting outer band, inner bands, and visor (about 40-50 seconds per item)

  • hot air rework station used to selectively heat and bend the center tab out

  • 2 minute boiling water bath to take the shape

  • two ultrasonic welds to secure two bands to each other

  • two more welds to secure visor to outer band

  • install shield

  • install rubber band

  • sanitize (in an ozone closet, provided by Nicholas Cucinelli of U of M's COVID response team)

Each day 3-5 Maker Works staff, wearing masks and socially distancing, would volunteer their time to produce several hundred face shields.

Our limiting factor was the laser cutting. Even with two lasers cutting full time, none of the other operations took longer than the cutting. So we looked at how to speed up the production of the bands.

The answer turned out to be a custom compound punching die. (A compound punching die both punched out elements (in our case, the areas around tabs) and also "blanks" the object, cutting the band from the surrounding material. This means the dies parts are much more complicated—there are two separate stripper plates (to push the cut object back level with the top of the die) each with their own die bolts and powerful die springs. But, it accomplishes both the punching and the blanking in one quick operation, which is what we wanted for the production rate.) Using design information from https://www.misumi-techcentral.com/tt/en/press/die-design/, 1045 medium-carbon steel from Alro in Jackson (our local Alro is closed at the moment), hardware from McMaster-Carr, and tooling from MSC Industrial, we used Fusion 360 CAD and CAM, and the Tormach CNC mill and Clausing lathe to design and machine the following:

  • punching die (upper and lower parts)

  • base plate (aluminum)

  • spacer (mild steel)

  • stripper plates (upper and lower)

  • tapered alignment pins (1" steel rods)

We installed these on the Scotchman 45-ton ironworker in place of the general purpose shear, then Al built an infeed table.

Cycle time for a single band dropped to around 10 seconds, and quality and consistency was very good. We did need to deburr one side, so we created a custom deburring tool using a tiny piece of a utility blade clamped in an aluminum holder.

Fortunately for everyone, within a day of the punch going into production mode, we received word from the last local hospital that their need for face shields was satisfied for the moment. We've been asked to go into standby mode, so as we're writing this we're wrapping up our last day of face shield production, a total of 7,501 face shields. The vast majority have gone to U of M, St. Joe, and Beaumont Hospitals. (Yes, we knew that if we created a punch and die to speed up production, we'd cause the demand to dry up. But that's a good thing. Same idea as bringing an umbrella to keep it from raining.)

Maker Works staff members were led by Irene and included Al, Pamela, Tim, Dulce, KC, Kirstin, and Dale. We also had help from MechShop members Tom and Marty.

A little recognition that has made us feel awesome: